Travel Photography with Asus Zenfone 3
On my recent trip to the Golden Triangle (Delhi, Agra and Jaipur), I decided to leave the DSLR at home and travel with the new Asus Zenfone 3. I was travelling with my kids and carrying around my DSLR would be an extra responsibility. Also the Asus Zenfone 3 is a mobile built for photography and I thought that it would be a good opportunity to check it out. I found the camera performance of the Asus Zenfone 3 exceeding my expectations on all fronts.

I am using the 5.5 inch variant and you can check out the rest of the specifications here. I have also published a detailed review of the Zenfone 3 here. Before we proceed, here are the key camera specifications of the Asus Zenfone 3.
Camera Specifications
- 16 MP primary camera
- f/2.0 lens
- 6 pieces largan lens
- 4 axis optical image stabilization
- Laser auto focus
- Dual LED flash
- 4k Videos
- 8 MP front camera

For ease of reading, the post have been divided to 3 sections, each covering a city during the travel. You can also check out the full gallery of photos on flickr.

Take off from Bangalore Airport
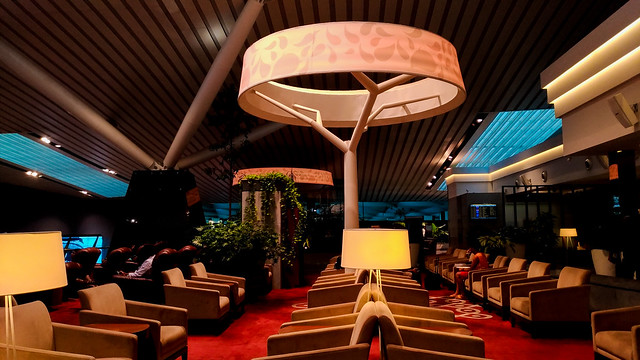
As I was with kids, I took no risk and reached the airport well ahead of time. It was a bit early in the morning for breakfast, but still we had some time to kill and we decided to spend it at the lounge. It was just before day break. Bangalore airport is well designed to let in natural light, but as the sun was not yet out, the lighting conditions were a bit poor. Check out this shot in low light. I pulled out the mobile and shot it on auto mode while on the move, pushing my daughter’s stroller. The shot is sharp and captures all details. The lighting details are exposed correctly and it was is very close to what I see with my eyes. I really liked the natural color reproduction, though under low light. The image has no artificial saturation, but there is a bit of noise and over sharpening on close (very close) inspection.
Exploring Agra
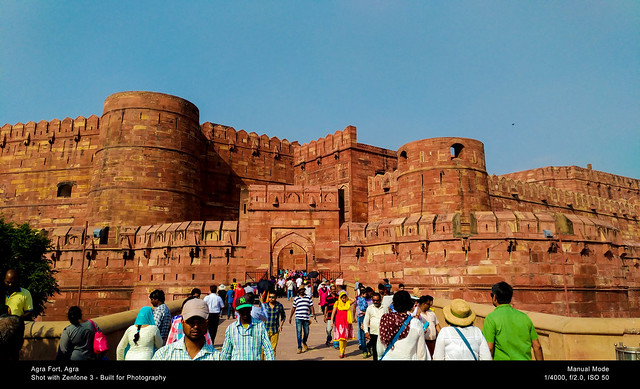
After we touched down in Delhi, we hopped on to our cab and headed directly to Agra. First stop in Agra was the Agra fort. The Agra fort is a massive structure and a remnicent of the glorius past and the incredible architecture in India.
This shot covers a wide-angle. It was shot on Manual mode. I am a professional photography enthusiast, if you didn’t know that already. I like to take control of the camera and prefer shooting in Manual mode whenever possible. I adjusted the white balance to a few kelvins above to have a warm light. You can check out the other EXIF details of the shot as well. I particularly liked the wide coverage angle this lens gets me. I have full controls on the color and exposure levels and the manual mode gives you live and true preview of the changes, before the shot is clicked.
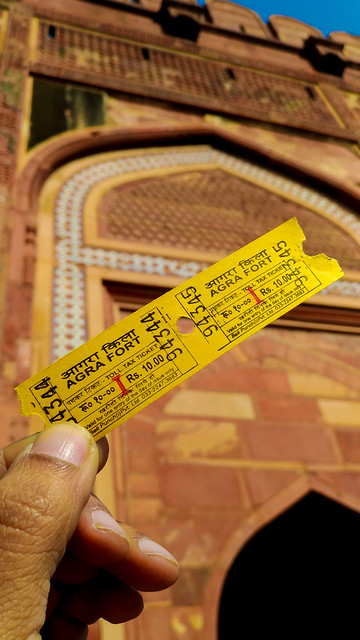
I had turned off the optimizations, under settings and I didn’t want the algorithm to do the processing. However this setting was proven to be ineffective. The pixel master algorithm did take over the processing and I wish the mobile had RAW image capturing capability. I had left the auto HDR on, always and found out that the image quality was improved this way.
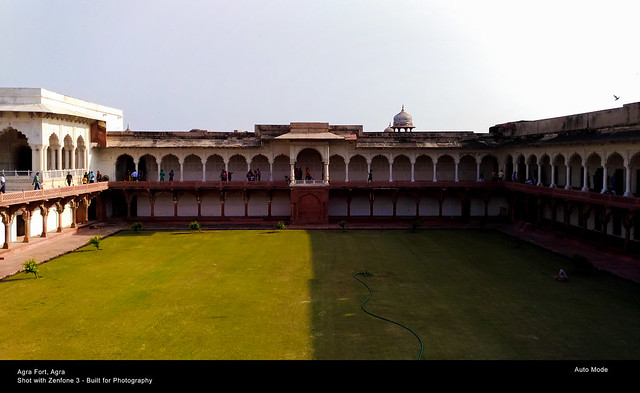
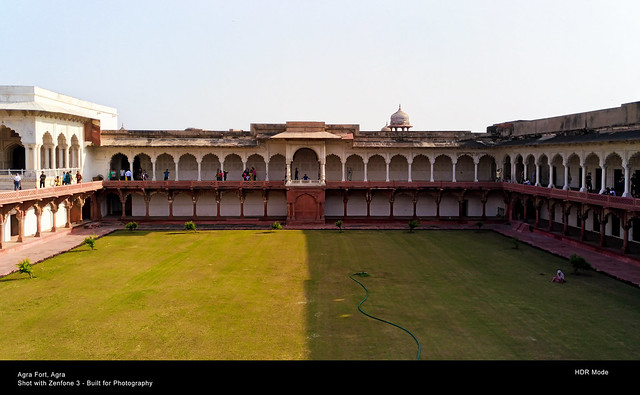
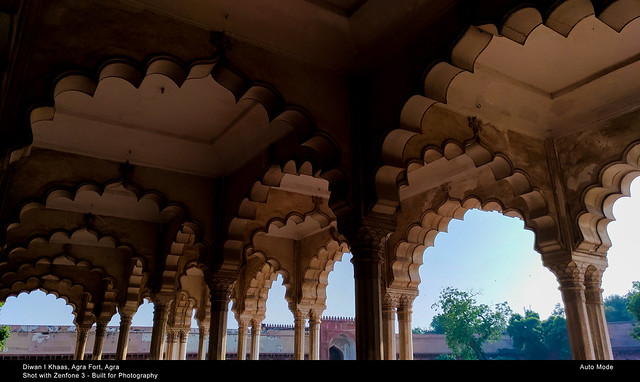
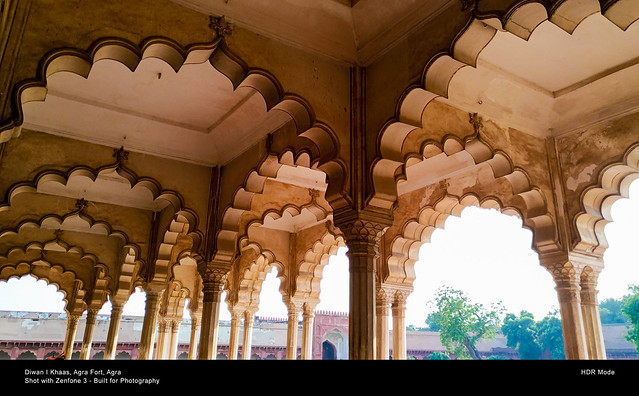
But do check out these two shots below. Both these frames were shot with Auto mode auto HDR and Pro HDR mode.
In the above two shots, I found the Pro HDR mode is very effective in bringing out the details from the under exposed areas of the frame. Also the color pop out very nicely. There is a bit of saturation, but still the shot stays within the natural color limits.
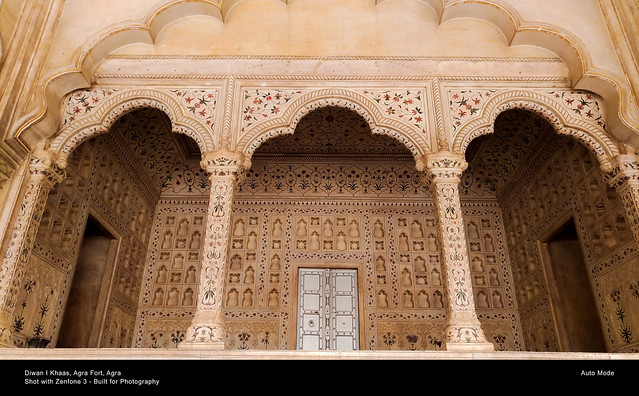
In this shot above, you can click and view in full size. The details have come out well. The white balance is also on the right scale. This is the Diwan-I-khaas at the Agra Fort. The marvel of craftsmanship and the intricate workmanship has come out really well. It was shot in Auto mode and later I used Adobe Photoshop Express on the mobile to brighten the image.
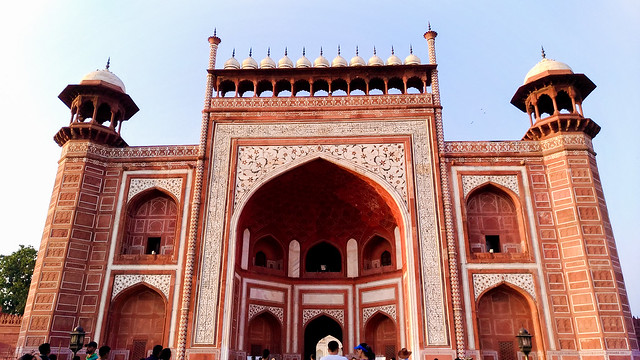
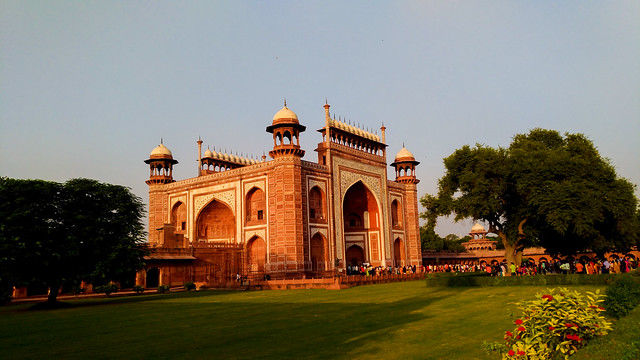
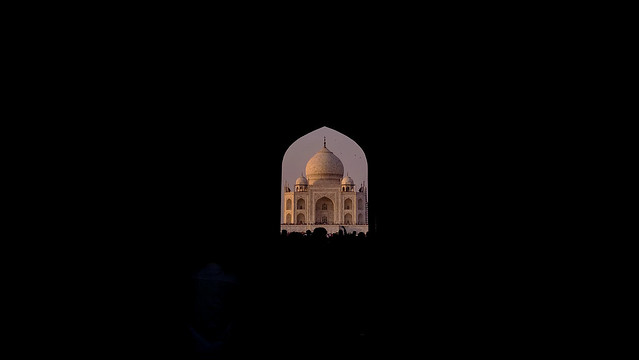
Leaving Agra fort, we arrived at the Taj Mahal just in time for the golden hour. A few minutes before the sunset / after the sunrise is known as the golden hour as the sun’s angle gives the best light for photography. The gorgeous fort entrance to the Taj Mahal was glimmering in the sun and I quickly shot this picture in Auto mode, without thinking a lot. I liked the colors in the image, especially the golden orange and the lawn greens. Again white balance was spot on, thanks to the color spectrum sensor on the Zenfone 3.
As I passed though the entrance, the first glimpse of Taj Mahal was mesmerizing. I switched to Manual mode to darken the frame around the Taj and expose only the Monument. I liked the fact that I get full control of the exposure just like in a DSLR.
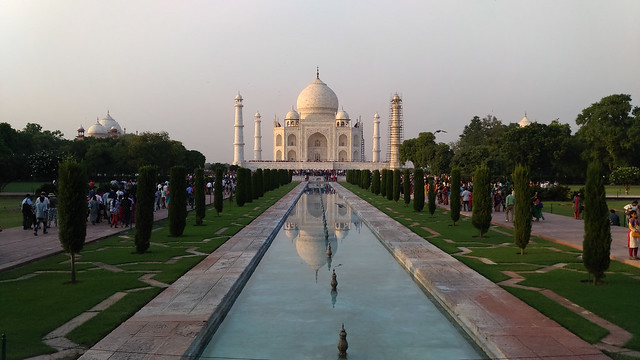
The first look at the Taj is always mesmerizing. The reflection on the pond was perfect for the classic Taj Mahal shot. I was still on the Manual mode and made a few adjustments to get the white balance right.
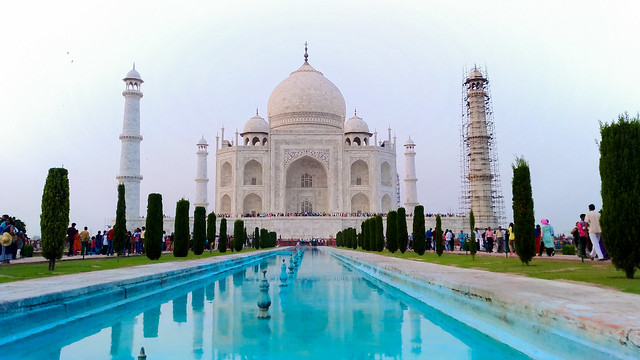
Taj Mahal is a white marble monument, but due to pollution the monument color is turning to pale yellow. It is cleaned regularly and you can see that the 3 minarets are white compared to the one that is being cleaned right now. I wanted to over expose the shot and make the monument as white as possible. When I adjusted the color balance, the blue pond color also popped out and this is one of my best shots from the trip. Here is another good shot of the Taj from the Zenfone 3 in Manual mode.
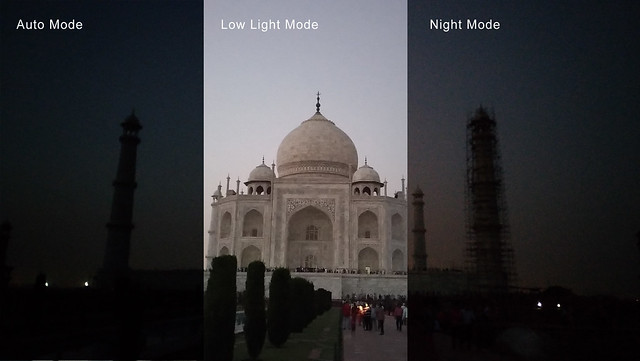
I spent quite some time exploring the monument and as I walked out, I noticed that it was pitch dark. I tried to click one last shot of the Taj and in auto mode, it was totally dark. Then I switched to the Night mode, the night mode did bring out some parts of the building, but the Low Light mode, was totally magic. Check out the details in the image above and a comparison between the three modes. The pixel master algorithm is very effective for low light shots.
Video capability
Asus Zenfone 3 is also capable of shooting 4k videos. Check out the sample below. The camera is quick to react to change in exposure. It immediately adjusts to different exposure levels. Focusing is also fast while the recording is on. Colors in the video is sharp and the 4K videos captures good amount of details. Image stabilization is not effective for videos, but it does comes in handy while clicking low light still images. Also the voice recorded with the video is pretty decent with good amount of noise cancellation.
You can check out the full gallery of photos in the album below.
Note: Some of the images have been corrected using image editing software in the mobile or on PC. But the corrections has been limited to adjusting brightness and highlights only. Contrast, saturation and noise levels has not been adjusted and are straight out of the camera.
My thoughts on the Zenfone 3 Camera
The Zenfone 3 has a great camera. It is not a replacement for a DSLR, but definitely a great travel companion. It does not let you down at any lighting condition. It has good color reproduction, but with manual controls, the color reproduction can be accurate or as desired. The sensor and the lens enable the images to have high levels of detail. Apart from the color accuracy, exposure levels, saturation and white balance is also remarkable. On auto mode the contrast can be bit off the mark, but again it can be changed in the settings for auto mode as well. Manual mode on the Zenfone 3 is a pleasing experience. HDR is perfect and this is one camera where I found the HDR mode to be used very effectively. The mobile camera has great low light photography capability. Overall the camera UI compliments the hardware well. It has a fair amount of useful features that can add a bit of life to your story. I really enjoyed exploring modes like Panorama, Slow motion videos, time-lapse video, super resolution, etc.. The Zenfone 3 has a good battery life as well. I found that, with a perfect synergy between hardware and software, the Zenfone 3 is truly built for photography. It was a good experience for me and as a photographer, this trip was an experiment that turned out to be pleasant because of the Asus Zenfone 3.

